In Hornet Leader, every good shiny stuff are paid using SO point , thats Special Operations points. So for example you want to bring F-35 stealth fighter then you must pay 3 SO for each F-35 (more SO is needed if you play longer campaigns). However an old aircraft like AV8B harrier give you additional +4 SO each plane (more if you play longer campaigns), so it all balanced out.

*my gaming table setup for hornet leader, thats for Iraqi 1991 long campaign with 12 planes
here's my mission description :
IRAN 2014 US MARINE CAMPAIGN
( 5 days , 36 SO Points available )
"If I had one more division like this First Marine Division I could win this war." , General of the Armies Douglas McArthur in Korea,
Description :
This is the big one , Iran has declared the ownership of Active Nuclear Weapons and internal unrest inside their ruling body will threaten to blow this conflict into regional nuclear arms race. Marines Assault Carrier on station in Persian Gulf area are ready to help the overall campaign against Iranian Defense Forces. This campaign will be the baptism of fire for the recently integrated F-35 Strike Fighter.
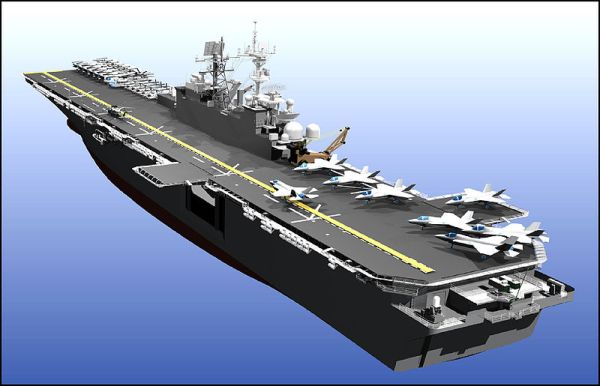
This Campaign is ran from a US Marine Corps Small deck Assault Carrier carrying AV8B Harrier II and F35 Lightning II along with the usual complement of AH1Z Cobra gunships and V22 Ospreys for supporting US Marine Ground Force. The USMC Aviation Doctrine is to support Ground Troops / Providing Close Air Support.
The usual support from a big deck US Navy Carrier is gone. There is no E2C Airborne Warning and Control, There is no Marine EA6B Prowler support for SEAD (suppresion of enemy air defense) , and the worst part is i cannot load HARM AGM88 Anti Radiation Missile to my strike aircraft , it is not supported by my current aircraft models.
However the inclusion of F35 Strike Fighter with its VLO characteristic will offset the disadvantages i mentioned above. Any Air Defense sites or Enemy Bandits cannot detect F35 at range +1. Even at range 0 they barely able to detect let alone Track the F35.

*Iran 2014 Campaign Map, my carrier is the little white triangle at the bottom of map. The available targets is at the lower band (closest). If im playing as US Navy, i can hit targets any target i want but US Marine must destroy the closest targets first before moving on to farther targets.
Squadron Selection :
For this campaign i am selecting 8 pilots with different skill set and capabilities. In selecting 4xAV8B Harrier II i got +16 Special Operation Bonus, so i use that SO to get 4xF35 Lightning II at the cost of -12 Special Operation points. That leaves me with +4 SO bonus and i start this campaign with 40 SO Points..
- THOR (Skilled) flying an F35
- PYRO (Average) flying an F35
- SALSA (Average) flying an F35
- MEATBALL (Average) flying an F35
- RUDDER (Average) flying an AV8
- CRISPY (Green) flying an AV8
- MYSTIC (Green) flying an AV8
- TURNIP (Newbie) flying an AV8

The pilot skill is determined by this rule, you cannot take all Skilled or Veteran or Ace pilots but you must spread the skill range according to the campaign length.

* Eight Aircraft for this Campaign Strike Group
The pilots get experience point on every mission, usually 2 XP per mission. If they reach certain point of XP (different for every pilot) then they can level up to their next skill level and get better Stats. As you can see above, the pilot cards showed their stats including AtA and AtG bonus (Air to Air and Air to Ground). That number will be added to your dice roll later on..
Thats concludes the Campaign setup , now onwards with the game !!
DAY 1
Primary target
PRIMARY TARGET : (37) MISSILE BOAT FLEET (Small, Vehicle , Dispersed)
IMPROVEMENT : Increase Weight Point penalty for all targets by 1
STAT : HIT=4 , VP=3 , RECON=2 , INFRA=1

*Primary Target (left), Secondary Target (Right). Note the big yellow '5' on the middle of card, thats the max number of aircraft you can send against this target. The scoring (if you successfuly destroy the target) is on the middle-right. On the middle right is the enemy resistance described in Sites and Bandits. Sites is a ground defense like AAA (Anti Aircraft Altilery) and SAM (Surface to Air Missiles). Bandits are the number of enemy Fighter protecting this target. App means Approach, there is 4 approach sites (North , East , South , West) so if the card said 1 Site APP that means 4 Sites total. Same with Bandits.
Since the primary target description note it as a 'scramble' , i must do the mission immediately (immediate threat). This kind of mission happens all the time, when enemy bombers (SU7 or SU24) attack your carrier you must also kill them immediately or lose the campaign.
MISSILE BOAT FLEET , Primary Target
Iranian defense have taken initiative and send multiple missile boats escorted by unknown number of bandits. the fleet is well defended by long range and short range SAM and AAA. Since the main target itself isnt that hard to destroy (only required 4 hits) , i will focus on getting in fast, launch my ordnance and then out quickly.

*Tactical Display showing Enemies (Bandit / Fighters are spawned at the Target-Bound Phase)
ARMING / WEAPONS LOADOUT :
My main AtG weapon will be the trusty AGM65 maverick that has bonus against vehicle type targets. The unknown bandit threat will be dealt with F35s carrying AIM120 and AIM9. I hope the advertised STEALTH really works against these Air Defenses.
My Strike group for this target consists of :
- THOR (Skilled F35) , Flight Leader , 2xAGM65 , 1xAIM120 , 1xAIM9
- PYRO (Average F35) , 2xAGM65, 1xAIM120 , 1xAIM9
- RUDDER (Average AV8) , 2xAGM65, 1xECM Pod
- CRISPY (Green AV8) , 2xAGM65, 1xECM Pod
Im using only 2 SO for this primary mission because i think im going to need lot of SO for the secondary target. (ERRATA: F35 should carry 1xGBU12 and 3xMK20 for a total of 1 SO for each F35)

*Pilot Selection and Ordnance Loadout
TARGET-BOUND FLIGHT :
I got a 'CRUISE MISSILE STRIKE' event card , this card give me option to choose 1 enemy site to destroy, so i choose a really dangerous SAM site with range:3 , that still leaves 1 SAM site with range:2 .. Not to dangerous as long as im not in range. The rest of the enemy air defense consist of AAA that can target only low flying ones.
To increase my strike group survivability, i order the F35s to fly HIGH and the AV8Bs to fly LOW. AV8B Harrier NOE (Nap Of the Earth) flying style give him high survival chance against attacks).
As the strike group fly closer . the enemy bandit start showing up on radar and it is bad, i got 3xMIG29 with range:3 , 1xMIG25 with range:4 and 1xMIG23 with range:2. This is bad , i got only 4 AtA weapons and 3 of the enemy are MIG29s..
The INTEL Air defense Adjustment put another 1 AAA site in the center area. As i approach the Stand-off Area i drew another event card "SEARCH AND RESCUE: No Adjustment"
OVER-TARGET TURN #1
My flight Leader THOR used 1xSA to initiate combat against enemy bandit. He launched 1xAIM120 to a MIG29 and destroyed it easy with his +1 AtA skill. Then PYRO also use his 1xSA to launch 1xAIM120 to another MIG29 and also killed him easily. That leaves 1xMIG29 and 1xMIG25 that cannot find my Stealth fighters at long ranges but they surely can attack my LOW flying harriers.
The MIG29 attack RUDDER's Harrier but his ECM pod saved him. then the MIG25 also target RUDDER and again his ECM pod neutralize the attack.
Since AGM65 need range:2 to launch , i moved my strike group closer to Center Area. The lone MIG23 moved closer to my harriers , but his movement also brings him to the range of my AIM9 of the still undetected F35.

*Tactical Display after the 1st Exchange of fire
OVER-TARGET TURN #2
With his remaining 1xSA , my flight leader launched his 1xAIM9 to destroy the dangerous MIG29 thats targeting my Harrier group. The Sidewinder easily destroy the MIG29 because he didnt expect a missile from his flank fired by unseen opponent.

*Tactical Display showing F35s ambushing enemy bandits
Still unaware of his friend's destruction , MIG23 attack RUDDER and again his trusty ECM pod works flawlessy. The pilot of MIG25 (range:4) launched his weapons to RUDDER (note: i roll dice to determine enemy target and it always RUDDER lol) and this time his ECM failed to negate the attack. Lucky for RUDDER the attack missed and the attack caused +1 STRESS to RUDDER.
Now its time for all my pilots to launch their weapons.
- CRISPY salvoed 2xAGM65 and got 1 HIT
- RUDDER salvoed 2xAGM65 and got 2 HIT
- PYRO launched 2xAGM65 and got 3 HIT
Now my harriers dropped all their load, they go straight home for safety reasons. If i still need to hit the target, i will use the remaining AtG on THOR in the next turn, but it seem i put enough HIT on the target to achieve mission success, even if the target classifed as 'SMALL' and caused my AtG weapon to hit less than its potential.
With the target destroyed (6 HIT total , 4 HIT required) , my strike-group quickly hit Afterburner and fly back to carrier to celebrate..

*Tactical Display showing Target Hits and Weapon Expended
HOME-BOUND EVENT:
I drew an event card 'Short Range Threat:Roll 2 Attack , can be neutralized by 1xAtG per attack (AtG with range:0 launch capability). So i use the spare 2xAGM65 from THOR's ordnance. My strategy to get in and get out fast works this time, with 2 spare AtG weapons that neutralize the short range threat in my home-bound event.

* from LEFT to RIGHT : Target-Bound Event, Over Target Event, Home-Bound Event
DEBRIEFING :
- Everyone got 2 XP and 1 Stress , Lucky for RUDDER his cool factor reduce the stress of this mission to just 1
- I got 3 VP for this mission and 2 Recon , 1 Infra
While this mission forced me to go in and out fast while focusing only destroying the primary target, it seem this is the right way to handle any strike. There is no point of playing Rambo and trying to kill every Air Defense sites on board.. the only thing that matter is the HITs you inflict on your primary target. So the limitations of this mission ('Small' Target, -1 WP penalty, Bringing inadequate AtA weapons) teach me a lesson in strike management. Lesson learned...

*Killboard comparing target destroyed in this mission with weapon that destroy it
The Intel Track is still dismal, i still get +1 enemy site at Center Area, but at least i can choose up to 4 targets per-day.

*Campaign Track Adjustment..
MISSION LOG :
The F35 proves to be the lifesaver in this mission, their load carrying is less than F18 Hornets that VMA marines fly on big deck carriers but their Stealth Capability overcame this small disadvantage.
The harrier proves to be a durable aircraft with its NOE (Nap Of Earth) defense bonus, although weapon carrying capability is dismally low.

*Mission Log for day 1 primary mission
NOTES :
Another newbie error happened in this campaign. In my zeal to save SO points by loading minimal Special Weapons , unknowingly i load 2xAGM65 Maverick to my 2xF35.
However in retrospect the target was hit 3 times with Harriers and it only need 1 more hit , i consider this is minor mistake , i should equip 1xGBU12 and 3xMK20 on each of my F35 for the cost of 2 more SO.
If i use GBU with my F35, i will have to fly at range:0 and with 4 AAA (only 1 can hit high altitude) site inside Center Area, I will have to depend on my Stealth (since both my F35 are not carrying ECM pods). if im using the 2xMK20 i will be forced to go low i will have 4 AAA threat to deal with..
i will deduct 2 SO for this mistake for total of 4 SO used in this mission. the other 4 free SO (for special weapons) will be used on the next mission that required 8 HITS..
************************************************
DAY 1
SECONDARY
SECONDARY TARGET : (46) CLOSE AIR SUPPORT (Secondary, Friendly Fire, Soft , Dispersed)
IMPROVEMENT : N/A
STAT : HIT=8 , VP=3 , RECON=2
*SECONDARY Target (RIGHT)
Marines Ground operation on iranian soil need our help. We need to take out the threat to our ground forces. Remember, precision is the key here as a miss would cause harm to our forces.

* Tactical Display showing events before bandit showed up
ARMING / WEAPONS LOADOUT :
Since this is a soft and dispersed target, i will take cluster bombs on my F35s, i will bring 1 harrier for additional AtG backup using trusty old AGM65.
My Strike group for this target consists of :
- SALSA (Average F35) , Flight Leader , 5xMK20, 2xAIM9
- MEATBALL (Average F35) , 5xMK20 , 2xAIM9
- MYSTIC (Green AV8) , 3xAGM65
Im gambling on a low bandit turn out and only bring 4xAIM9 for self defense, the harrier dont even carry an ECM pod. I hope this turn out all right. If i survived this mission, i will save SO points..

*Pilot Selection and Ordnance Loadout
TARGET-BOUND FLIGHT :
I got "AERIAL REFUELING' event card and it gives me an extra turn on target, not that i want to stay longer than neccessary. To increase my strike group survivability, i order the F35s to fly HIGH and the AV8Bs to fly LOW. AV8B Harrier NOE (Nap Of the Earth) will compensate for the lack of ECM pod.
As the strike group fly closer . the enemy bandit start showing up on radar and there is only 2 bandit on screen. I got 1xMIG25 with range:4 and 1xMirage3 with range:2.
The INTEL Air defense Adjustment put another 1 AAA site in the center area. As i approach the Stand-off Area i drew another event card and got a "LUCKY BREAK:enemy and bandit suffer -1 from high aircraft over target". this can be usefull if im fighting bandits over target, but most of my AtG ordnance are low altitude only. This card is just a bit better than 'no adjustment' card

* Tactical display before start of turn #1
OVER-TARGET TURN #1
My flight Leader SALSA give 1xSA to MYSTIC and he launched 1xAGM65 against SA-11. MYSTIC rolled a 8 and with his +1 AtG skills he got 9 , more than enough for a Maverick hit (7/10)
The MIG25 with his Range:4 attacked MYSTIC and he evade the attack but he got stressed (+2 Stress)..
Now my strike group fly closer to the center area, my plan is to drop the MK20s from low altitude with the F35s with the harrier shooting 2 more AGM65 to the center area AAA site, to minimize the risk for the F35s. The Harrier tried to keep the distance between him and the mirage, so he stay at the Stand-Off area for a while. Since i got 6xTURN , i will take this slow and careful..
The enemy mirage moving closer to intercept my harrier but they both blind to the F35 who got VLO aspect from frontal area (Very Low Observable).

*Tactical Display before the start of TURN #2
OVER-TARGET TURN #2
With his remaining 1xSA , my flight leader (SALSA) launched his 1xAIM9 aimed at the pesky MIG25 and hit him easily (roll of 8 , +1 Ata , +1 Mig25 modifer for a total of 10, highly above the required 6 for sidewinder).
The enemy Mirage , still out of range from my harrier got shot down by another AIM9 shot from MEATBALL (roll of 6 , +1 AtA skill , +2 Mirage modifier for a total of 9)
That cleared out all the bandits from the area, now i can focus on hitting the target and reducing the AAA site on target area..
My strike group now fly closer to center area

*Tactical Display before start of TURN #3
OVER-TARGET TURN #3
From his position at the Pre-Approach Area, MYSTIC attack 1 AAA site with 1xAGM65. He destroyed the SA6 with a roll of 6 (+1 AtA, +1 SA6 modifier for a total of 8 and enough to hit with a Maverick 7/10).
One more AAA site in the center area that can give me grief..
OVER-TARGET TURN #4
MYSTIC fired his 1xAGM65 against the SA-13 and he missed with his last ordnance.. so my F35 have to enter the center area with 1xAAA threat still active
My harrier moved out from the conflict area and my F35s moved to the center area..

*Tactical display before start of turn#5
OVER-TARGET TURN #5
SA-13 tried to detect and attack MEATBALL and this time the stealth failed. MEATBALL tried to supress the attack and succeed with 1xMK20.
SALSA salvoed his 5xMK20 to the target area and got :
- 1st MK20 : Roll of 9 , Soft+5 , AtG 0 , Total 14 : 2 HITS
- 2nd MK20 : Roll of 1 , Soft+5 , AtG 0 , Total 6 : 0 HITS (+1 Stress)
- 3rd MK20 : Roll of 10 , Soft+5 , AtG 0 , Total 15 : 2 HITS
- 4th MK20 : Roll of 5 , Soft+5 , AtG 0 , Total 10 : 1 HIT
- 5th MK20 : Roll of 8 , Soft+5 , AtG 0 , Total 13 : 2 HITS
MEATBALL dropped 2xMK20 to the target area and got :
- 1st MK20 : Roll of 3, Soft+5 , +1 AtG, Total 9 : 1 HIT
- 2nd MK20 : Roll of 10 , Soft+5 , +1 AtG , Total 16 : 2 HIT
Thats a total of 10 HITS on targets, more than enough to kill it (need 8 hits to destroy it)
Thats it now its time to go home..

* tactical display showing 10xHITS on Target and 7xMK20 dropped on it.
HOME-BOUND EVENT:
I drew a home-bound event card 'Pre-Strike : During the next primary mission, draw 1 less Site for the center area.. not a bad bonus considering my INTEL track still add +1 site center area every mission..
DEBRIEFING :
- Everyone got 2 XP and 1 Stress , This pushed MYSTIC's stress level to 3 and he is now borderline shaken.. 1 more stress and he will be shaken.
- I got 3 VP for this mission and 2 Recon

*Killboard comparing target destroyed in this mission with weapon that destroy it
The Intel Track is still dismal, i still get +1 enemy site at Center Area, but at least i can choose up to 4 targets per-day.

*Campaign Track Adjustment..
MISSION LOG :
The Stealth protects my F35s right up to the time they enter center area and got targeted by an SA-13.

*Mission Log using the expanded Runefang log from BGG files section
NOTES :
I add +4 SO usage for this mission even if i havent use any special weapon, to compensate the wrong ordnance loading on Day 1's primary mission (loading AGM65 to F35)
Thats all for day 1.. from now on things will get harder and harder =D
Thats all for day 1 , Thanks for reading =D

Photo of the Day : Losing the Defensive ECM Pod Roll.. (need 6+)
No comments:
Post a Comment